News
29 May 2020
Home Alone Too
Subscribe to CX E-News
Given the crazy situation we’re all in, more of us than ever have suddenly found ourselves recording at home. Some of us have decided to track that Opus we always promised ourselves we’d produce (which is awesome); others are participating in large (remote) group tracking sessions, contributing parts in isolation. If you’re in one of these camps, and you want your recordings to sound professional, here are some basic do-s and don’ts about recording in a space that’s far from ideal.
Monumentally weird times call for inventive, sometimes unorthodox (and visually displeasing) solutions to unforeseen audio problems…
For some of us at least, this nationwide lockdown has prompted us – either out of a fundamental need to preserve our sanity, or sheer boredom – to start recording at home.
Many of us already do this anyway of course, and I know from letters I receive that lots of CX readers have been tracking, mixing (and even mastering) at home for decades – including yours truly.
So while we’re all locked down, here are a couple of tips for recording at home, assuming three things: that you’ve had no time to prepare for the change of venue, there’s no money to invest in fancy room treatments or new gear, and you have plenty of time on your hands to experiment with techniques you’ve never bothered to try.
Before we dive in here, I should just say that part of this article has been prompted by my own participation in a huge group tracking session that came my way a few days ago. I’ve volunteered to edit, mix and master it for a YouTube release later in the week.
As well as recording parts for it myself here at The Mill (in isolation of course), I’ve been sent audio files by literally hundreds of people, each of whom has recorded his or her own part at home, while also filming their participation for the associated video (I talk about this in greater depth on page 34.) ‘Massing Online’ – www.cxnetwork.com.au/massing-online CX Magazine, May 2020.
The sonic quality of these performances, needless to say, has varied greatly! So much so that on several occasions I’ve been sitting at the console shaking my head in astonishment, at the sheer randomness of the audio signal coming through my Genelecs.
Some of it has been so beyond the pale as to be unusable, thanks mostly to extreme room resonances and background noise caused by people naively setting themselves up in acoustically ‘hard’ rooms, several metres away from a mic.
Others have had the original click track file mixed back into their audio bounce – what they were thinking there I’m really not sure! Anyway, there are many things you can do to avoid falling into the amateur recorder’s trashcan, even if the amount of equipment at your disposal right now is almost nil.
Back To The Drawing Board
Getting right back to basics here is probably the best place to start.
Let’s say, for instance, we want to record a vocal at home… that’s a pretty common occurrence at the moment, and more often than not this is where people get into trouble right out of the gate.
There are several things to consider if you’re serious about recording a vocal at home if you want it to meet some kind of standard befitting a future release (or for that matter, your next contribution to a mass online band).
Assuming you have a microphone at your disposal, and preferably a stand too (you could even Gaff a mic to a broom handle if you’re desperate), there’s every possibility, given what I’ve been seeing over the last week, that without the professional surroundings of a studio or an engineer in the room guiding your setup, you’ll simply plug in and start recording.
Hold everything right there!
There are several things we’ve got to consider about our setup before we’re ready to start tracking! If we overlook any of these our recording is likely to sound average at best – awful in some cases.
Let’s start by assuming we only have a Shure SM58 or Sennheiser e935 (two very common cardioid dynamic mics), or maybe you have a more desirable condenser mic… at this point it doesn’t really matter. You could have your phone gaffed to a tree branch for the purposes of this exercise.
For starters, choose a mic that’s directional… cardioid-patterned preferably. A ribbon mic will be less useful in this instance because its figure-8 pattern will record everything behind the mic as well as in front of it.
If your room sounds ordinary (which it often does) or is noisy for some reason, you’ll potentially strike trouble using this mic. The same logic applies to a condenser if it’s in figure-8 or omni.
Now at this point you might be set up in a room you’ve recorded in a thousand times before. Regardless, now is the time to remember two important things: that you need to track in a quiet space, not in the front room 10 feet from a busy street (not that there are many of those at the moment!) and not without a pop shield.
I don’t care what mic you’ve set up; you can’t record vocals without a pop shield. If it’s a 58, a pop shield is still mandatory. The same goes for any other mic you care to name (unless it already has a decent foam shield incorporated into its design, like an SM7 etc).
If you don’t have one, make one out of a coat hanger and a pair of stockings. Failing that, tape a pencil to the centre of the mic’s outer grille – crude but effective.
Both these options might look ugly, but we only care what our setup sounds like, don’t we… not what it looks like. If you’re concerned about looks, consider a job in the film industry.
Now… two more things to consider, and these are crucial too. Where you point your dynamic cardioid microphone is vital to the quality
of the recording, because if it’s aimed at something noisy, or hard, you’re in trouble.
Why? Because a mic picks up everything behind you, the singer – not behind itself! For some reason, everyone seems concerned with stopping unwanted ambience getting into the back of their microphone, never the front of it. But that’s a misnomer if the mic is cardioid-patterned.
What matters then is what the mic is facing towards. If that’s a hard surface, all the room ambience bouncing off the wall behind you gets picked up by the mic as it simultaneously records your vocal! Conversely, if the rear wall is quite absorbent (dead), we’re on track for the vocal to sound half decent.
The next thing to remember is that your lead vocal track is likely to be louder, and possibly more compressed, than anything else in your new production.
So even if you don’t compress while you’re tracking, chances are the vocal will have some (or possibly lashings) of this process applied later on.
Bearing this in mind, any room resonances, flutter echoes or ambience in your space that’s left untreated, or seems inconsequential at the time, is going to be MAGNIFIED by the various mixing and mastering processes that will occur down the track.
What does this mean? Well, put it this way: if your recording sounds a bit ‘roomy’ now, it’s going to be a hell of a lot worse when a bunch of compression is added to it later.
This is the key problem of most home recordings: ambience, whether ugly or sweet, gets greatly amplified by compression, and that is rarely a good thing for a main vocal.
This is why singers often record in a ‘dead’ vocal booth – so that when the vocal gets compressed at 4:1 during tracking, then again during mixing, and yet again during mastering, it remains detailed and dry, not a washed out, resonant mess.
Impromptu Vocal Booth
Almost no-one I know has a vocal booth at home (a pity), although walk-in wardrobes can sound pretty cool. What you need to do now is build a dedicated isolation booth inside the one you’re currently isolated in! Not like the ones you see in glossy mags, but rather, one you can construct in 10 minutes out of found objects around the house.
This can be as simple as a queen size mattress tipped on its side against a wall – although this is not recommended, as it’s never very popular with your other half!
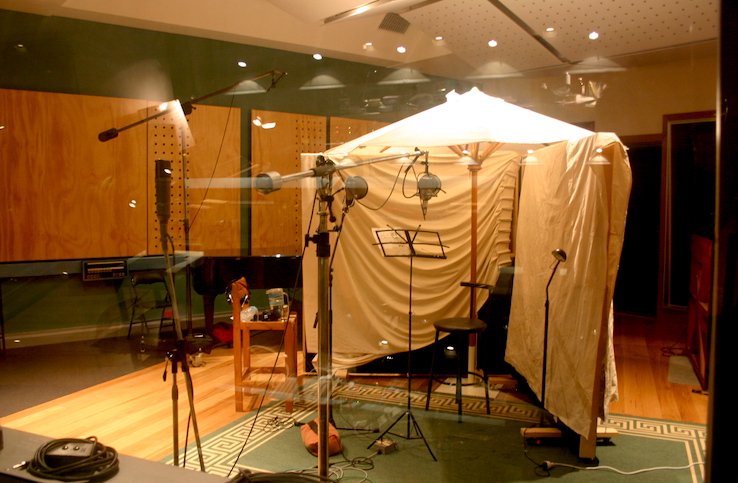
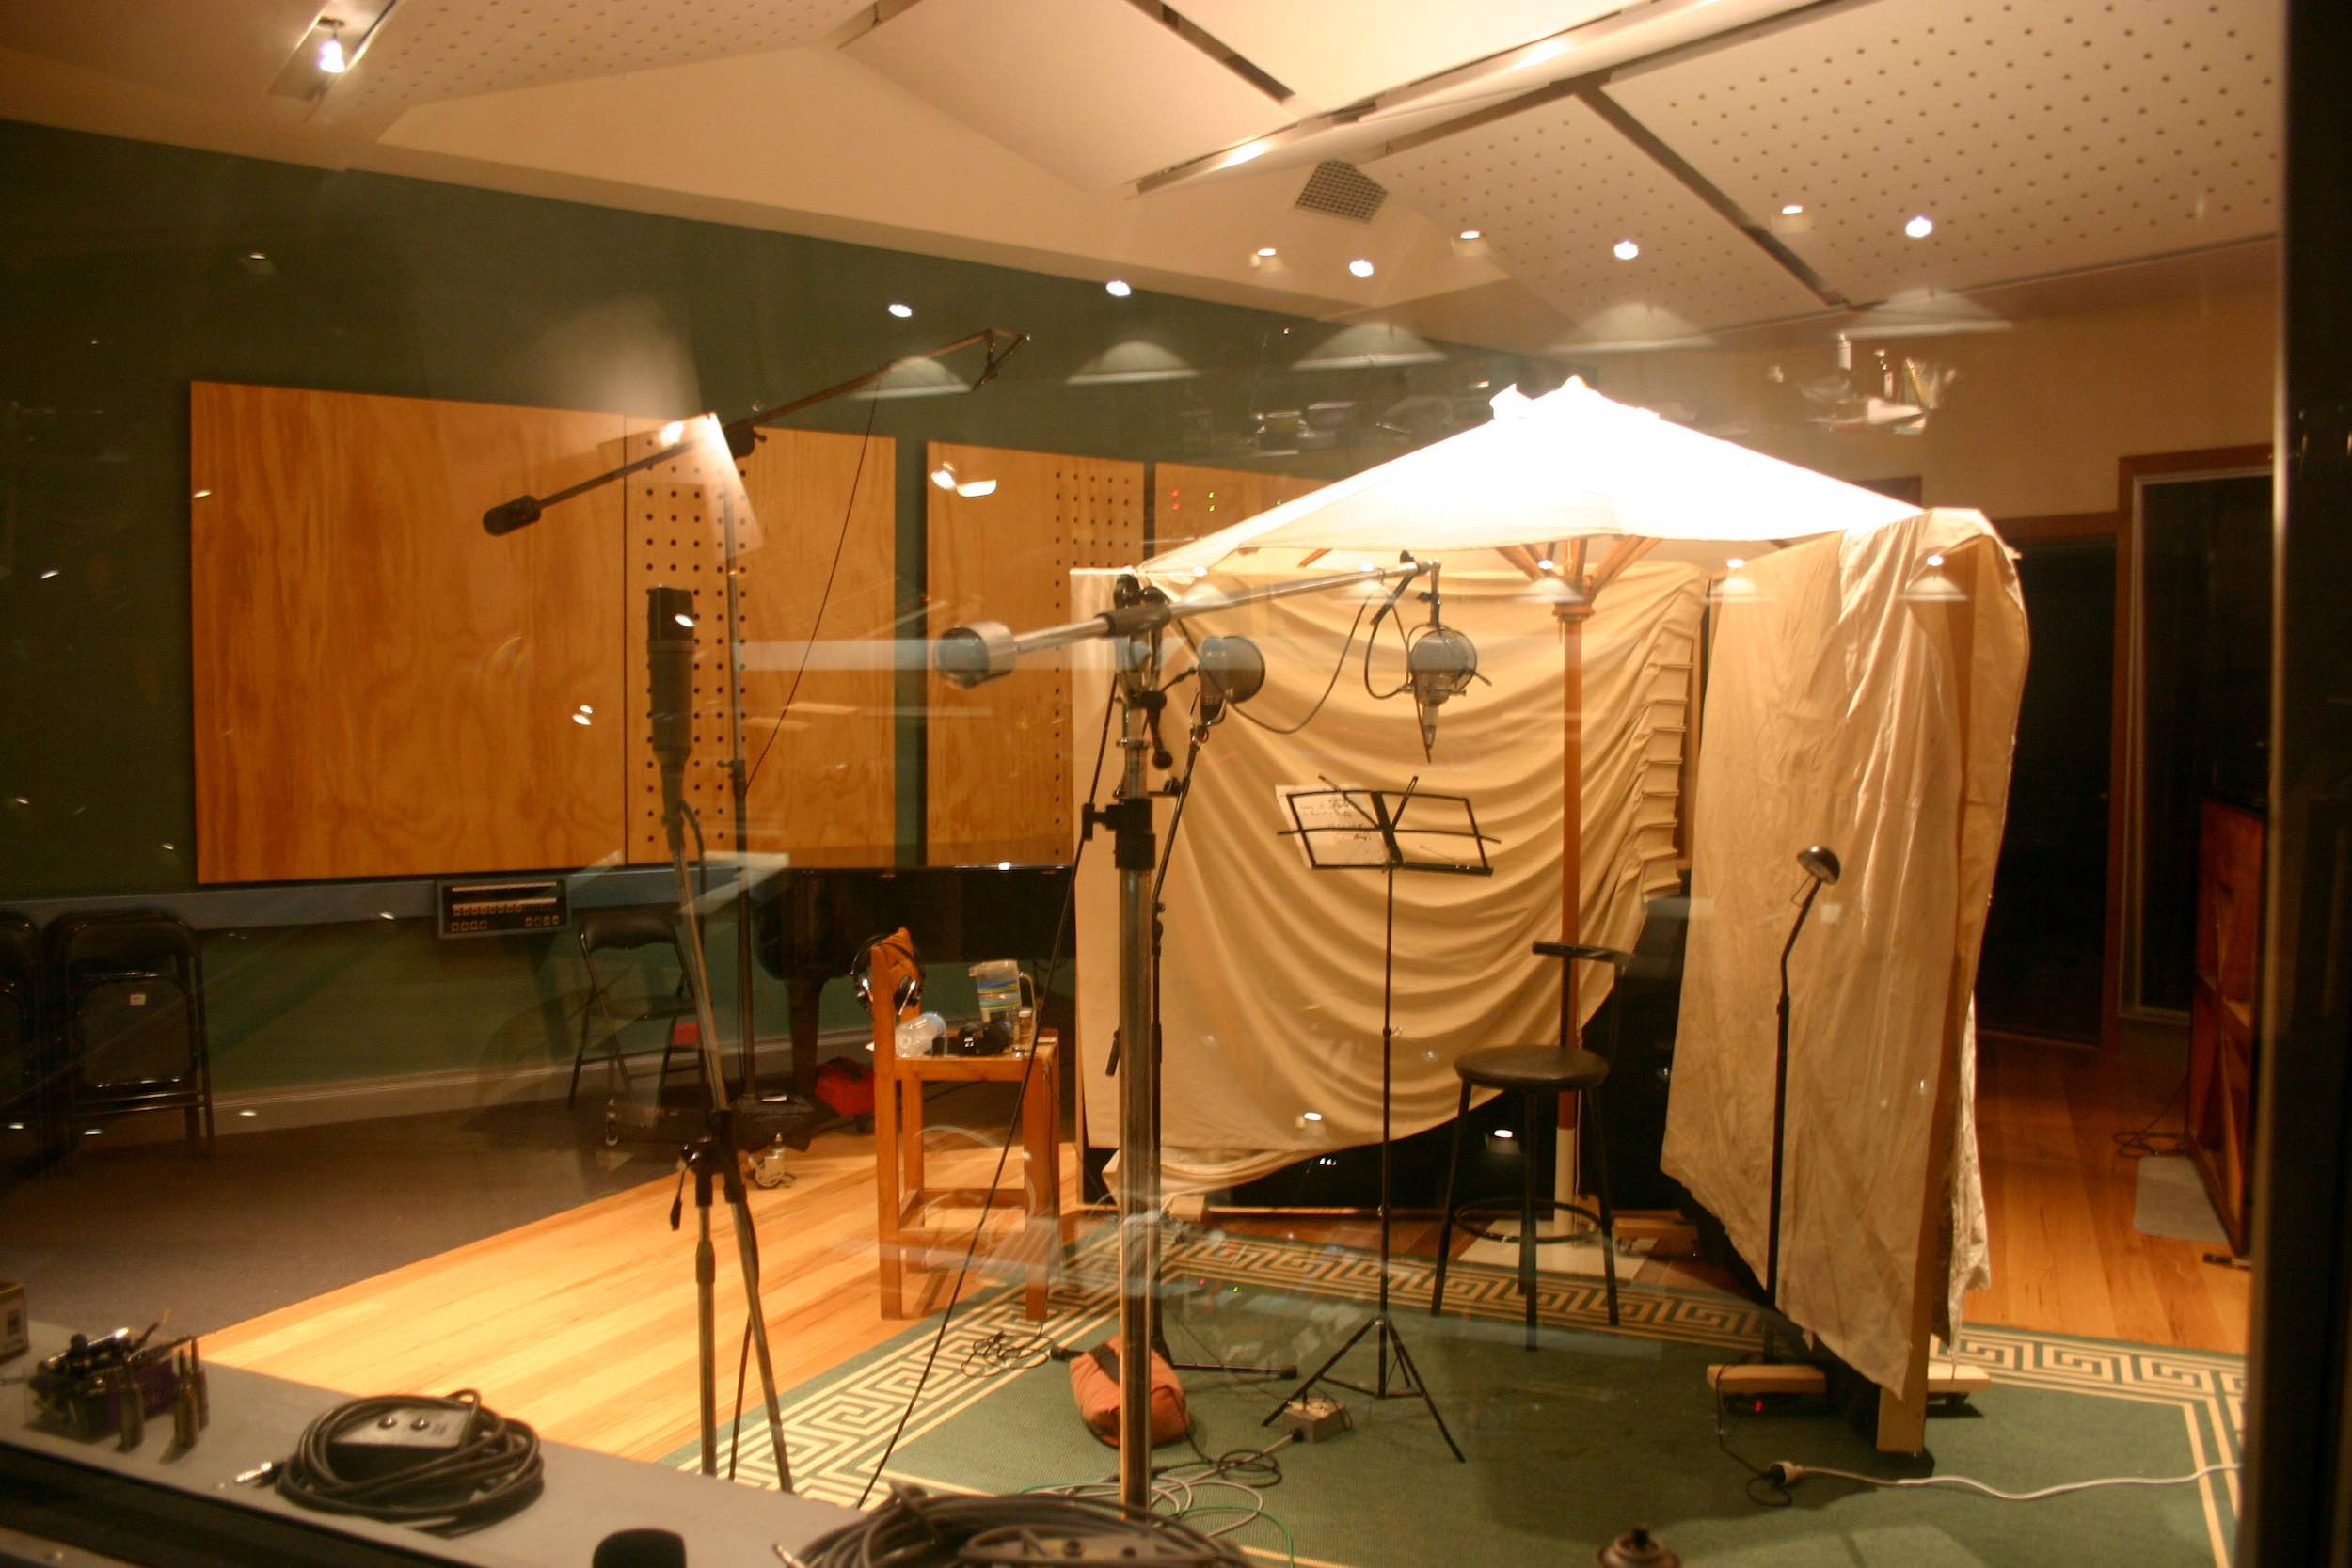
By far the best (butt ugly) design option is a Dead ‘V’. This is something I talked about way back in Issue 110 of CX. It’s a setup used by countless engineers the world over, whether they’re in Abbey Road Studios or their flat in Abbotsford.
It’s one of the most crucial bits of hardware in any home recording setup, and it’s free. A ‘Dead V’ is great for recording almost any instrument that requires a more isolated, deader sound than any untreated room could ever provide.
Given our current circumstances where we’re all trapped in our acoustically compromised houses, this setup basically applies to nearly everything we’ll be recording for the next few months, so get building.
By placing two soft walls in an open ‘V’ configuration, so that a directional mic points straight at its centre, you not only deaden the room overall, you also provide a far less reflective rear wall for the tracking of your vocals, guitars or pots and pans etc.
The subsequent audio recording will contain far less embedded room ambience, making for a far tighter, more versatile sound later on in the production.
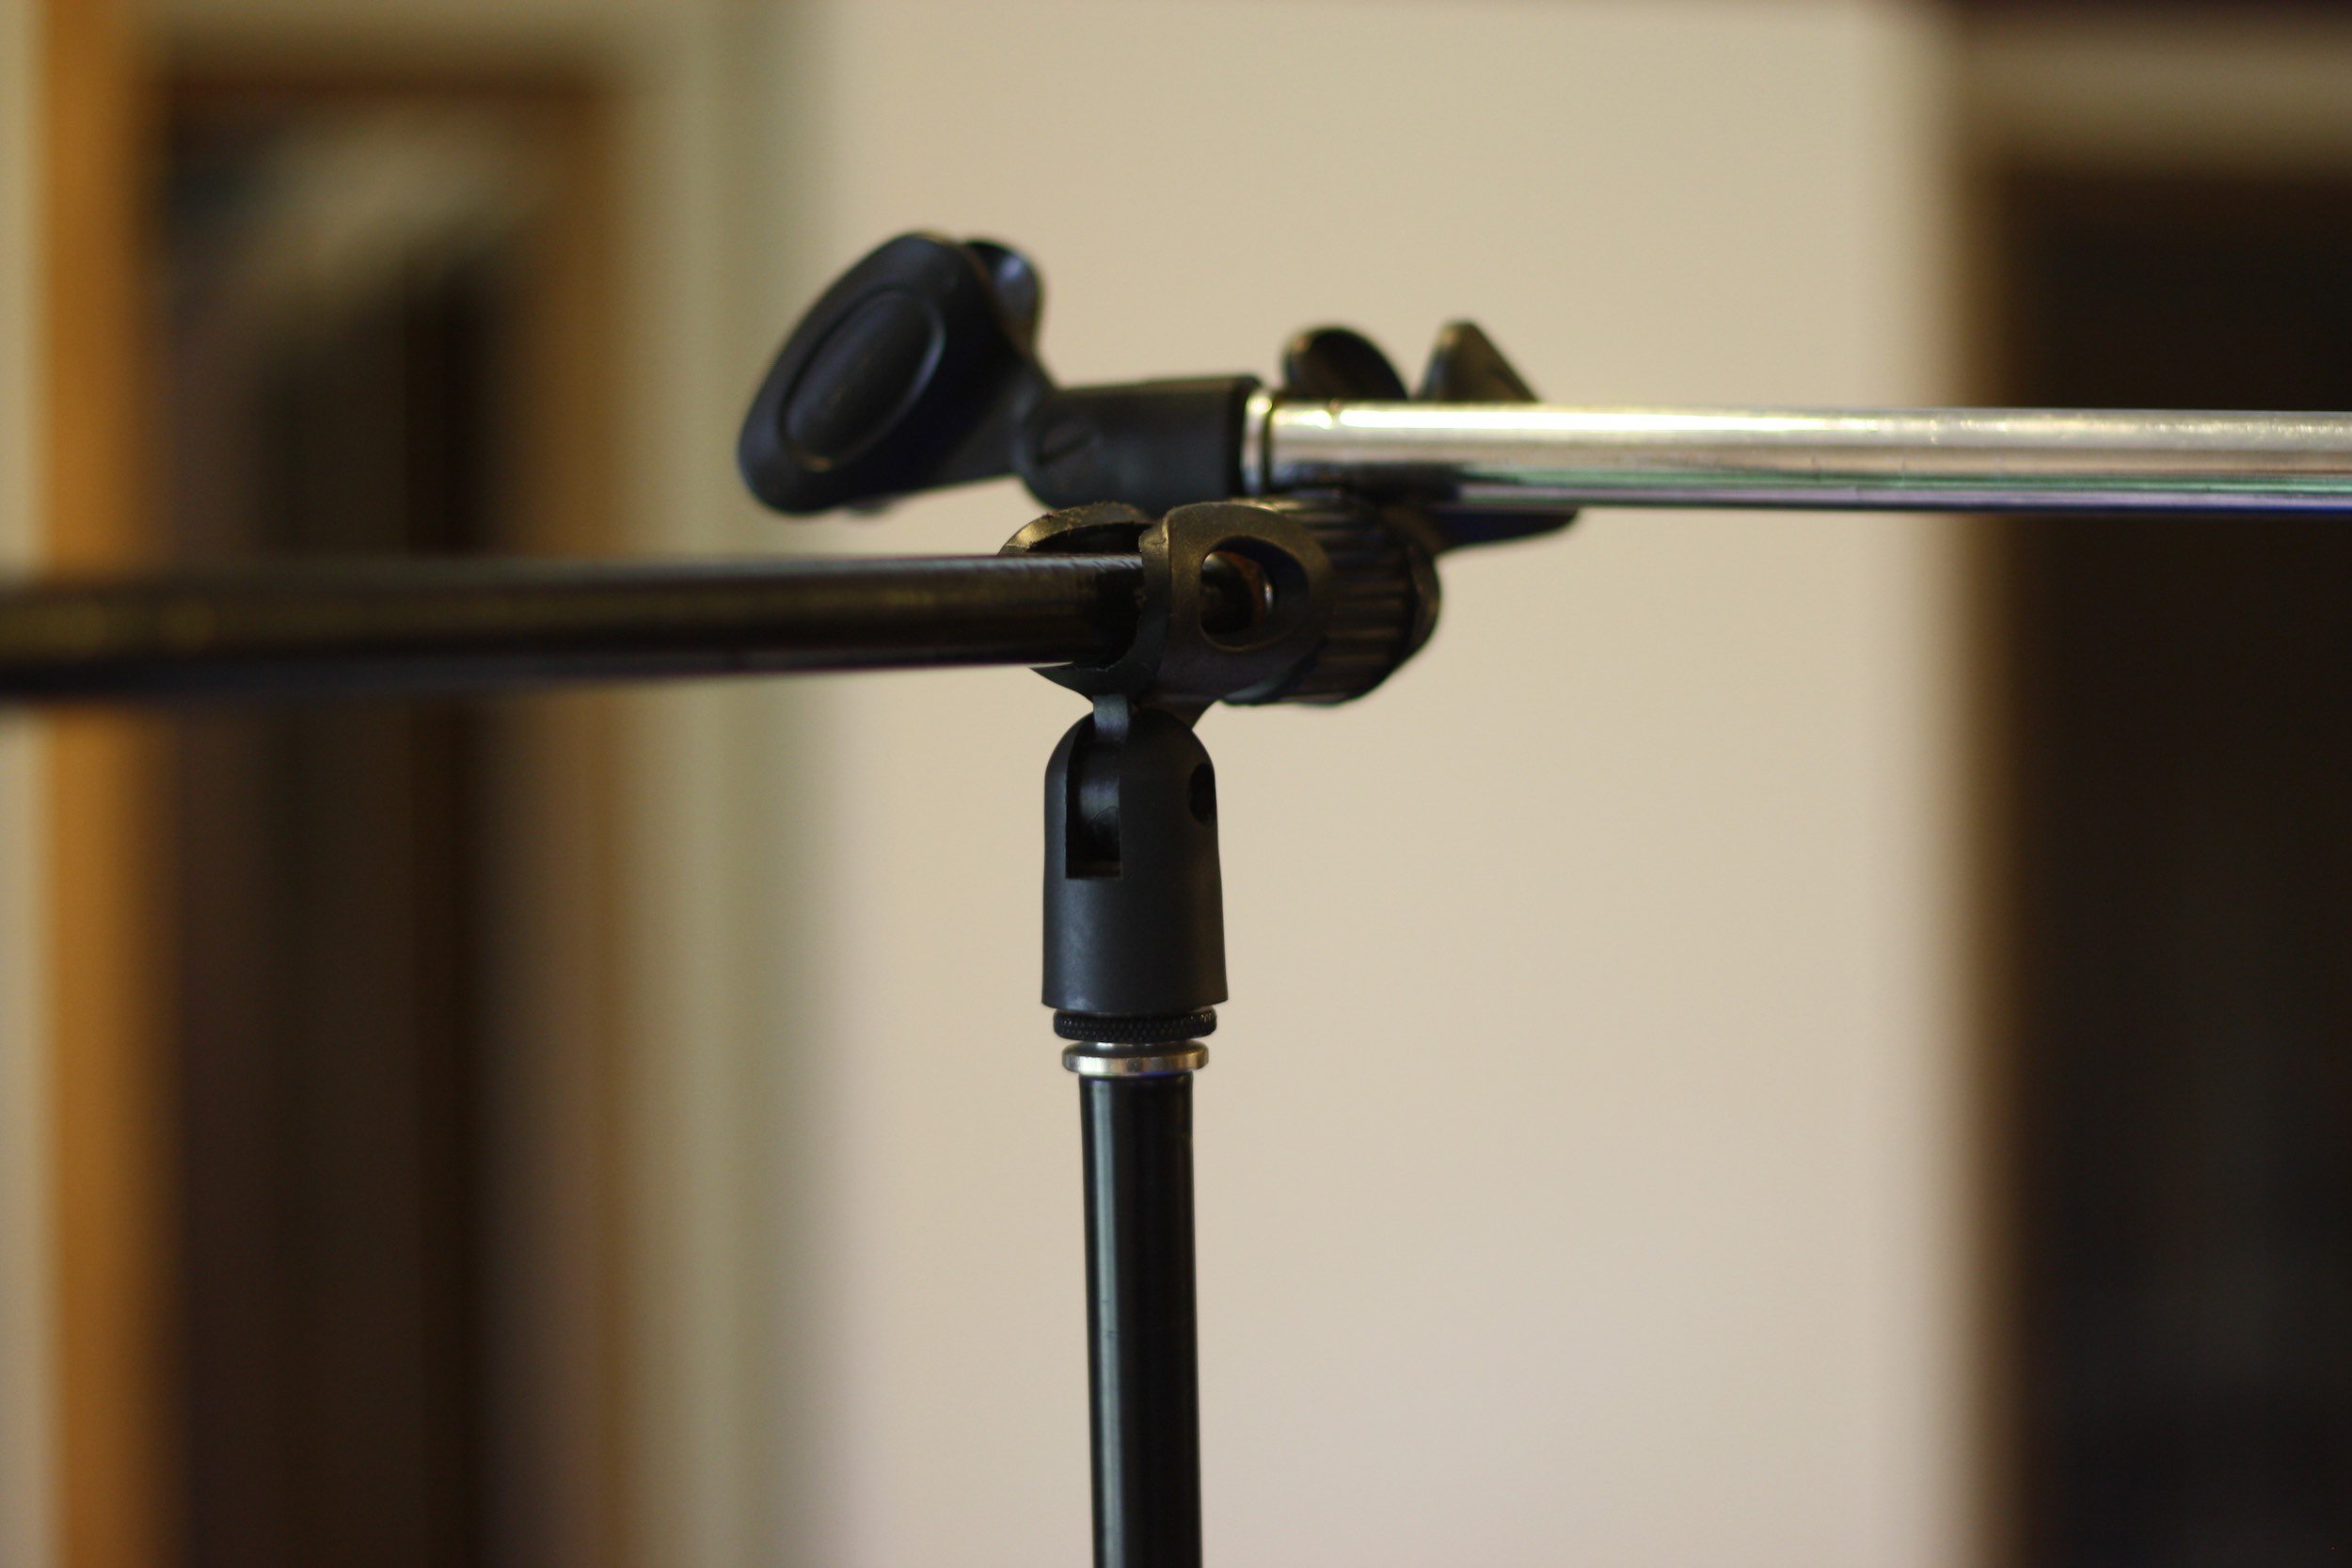
You can build a Dead V with either a few mic stands or lengths of fairly strong dowel. To build the mic stand option, fully extend two boom stands up and at 90-degrees (parallel to the floor).
In this state they’re impossibly weak on their own, but when a third upright stand is placed at the centre of the V to carry the two extended arms, the structure becomes quite sturdy (see pic).
Gaffa tape them all together or use the mic clip of the middle stand to hold the others up. Carefully throw a couple of doonas or heavy canvases over this frame arrangement, and viola! A Dead V.

If it’s strong enough and high enough you might also consider throwing something soft over the top to create a roof (although this often puts more stress on the structure than it can handle).
Audio Aneurysm
The other thing to watch out for when you’re recording at home is headphone bleed. Far too often I receive home recordings that have clearly been tracked with open-backed headphones (ones that don’t have
a solid outer shell).
These can render audio recordings unusable for several reasons. Firstly, given that there will nearly always be compression added to an instrument later on – whether that’s by you or someone else – this will tend to exacerbate the level of bleed (do I detect a recurring theme here?).
If this consists primarily of things like click tracks, guides and other superfluous ingredients, you’ve potentially got a serious problem on your hands that’s difficult to solve… except by you, right now.
If you only have open-backed headphones, try putting a couple of layers of Gaffa tape over the areas that leak sound, to at least dull the spill. Every bit helps!
Failing that, there’s another, slightly more complicated trick involving a second channel and a polarity flip. After you’ve recorded your vocal performance, let’s say, and now you’ve discovered that the guide guitar and click track have spilled into the signal, all is not lost.
Here’s what you must do: open a second recording channel immediately, stand (or sit) exactly where you recorded your successful take, and using the exact same headphone cue, track the performance again, this time without making a sound.
What you’re doing here is recording the headphone bleed again, only this time on its own. Now add the two signals together, with the polarity (phase) of the second channel flipped. This should all but kill the spill stone dead, or at the very least, reduce it.
If you’re recording at home and don’t do something to ‘shut down’ the main resonances of your tracking space, you’ll lose the battle against corrupting ambience.
Don’t let your general ignorance of complex acoustic theory paralyse you. More often than not there’s an easy fix to improve the situation. Just don’t use your eyes!
Stay safe everybody.
Andy Stewart owns and operates The Mill on Victoria’s Bass Coast. He’s a highly credentialed producer/engineer who’s seen it all in studios for the last three decades. He’s happy to respond to any pleas for recording or mixing help… contact him at: andy@themill.net.au
CX Magazine – May 2020
LIGHTING | AUDIO | VIDEO | STAGING | INTEGRATION
Entertainment technology news and issues for Australia and New Zealand
– in print and free online www.cxnetwork.com.au
© VCS Creative Publishing
Subscribe
Published monthly since 1991, our famous AV industry magazine is free for download or pay for print. Subscribers also receive CX News, our free weekly email with the latest industry news and jobs.
Recent posts


Latest jobs