News
17 May 2021
How to route FX on a DiGiCo console, the better, “cooler” way

Subscribe to CX E-News
Anyone who’s used a DiGiCo console knows how intuitive it can be and how quickly you can pick it up and just start mixing. If you understand the basic concept of routing, your analogue mixing experience means you can get up and running pretty quickly. Why? Well, they just make sense. On an analogue console the mic socket is at the top of the console or the back – so it is on a DiGiCo. Touch the top of the channel to get input routing. Whereas the subgroup buttons on an analogue console are at the bottom near the faders, so (you guessed it) touch the bottom of the channel to get your subgroup and output routing. Easy!
So how do you route FX ? On an analogue console you would do the following:
Turn up the Aux on a channel
Connect a cable OUT of the Aux socket on the console to the IN of the FX unit
Connect a cable from the OUT of the FX unit to a channel
Turn up the Aux Master
Then turn up your FX return channel
And on a DiGiCO?
Turn up the Aux on a channel
Tap the bottom (output routing) of the Aux Master and select a FX from the rack (don’t forget to load the FX in the rack first – just like you have to do in the real world)
Go to your return channel and touch the top to get the input routing screen and select the FX you want to return into the channel
Turn up the Aux Master
Then turn up your FX return channel
Pretty simple yeah?
The common issue people raise is that they have to switch between screens to get to the FX rack so they can push the tap tempo button, or adjust settings. The tap tempo is an easy fix – use DiGiCo’s macro feature to put the tap tempo on a button so it’s always on hand. “Yeah but it doesn’t flash the tempo on the macro button like it does when I use it on the FX rack”. OK, well… hold my beer*.
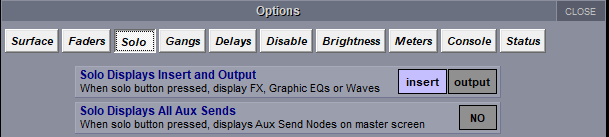
On the Master Screen on a DiGiCo, go to Options->Solo and enable the Solo Displays Insert and Outputs for Inserts
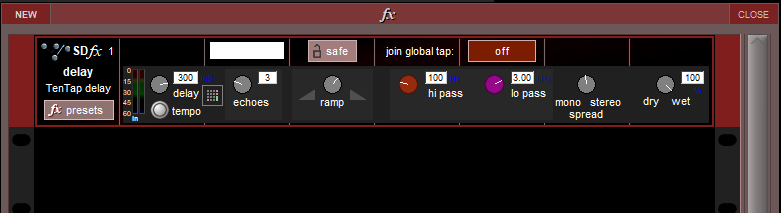
Load the Ten Tap Delay FX in the FX Rack
Turn up the Aux on a channel (for this example we will use Aux 1)
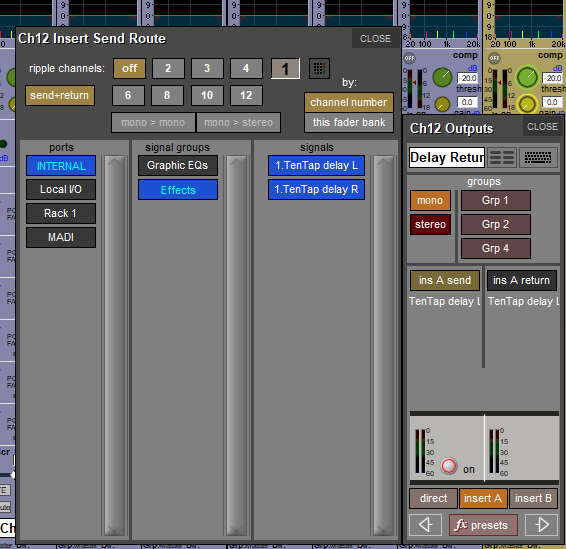
Go to your return channel and touch the top to get the input routing screen and select Internal->Auxes->Aux 1 to be the input to this channel
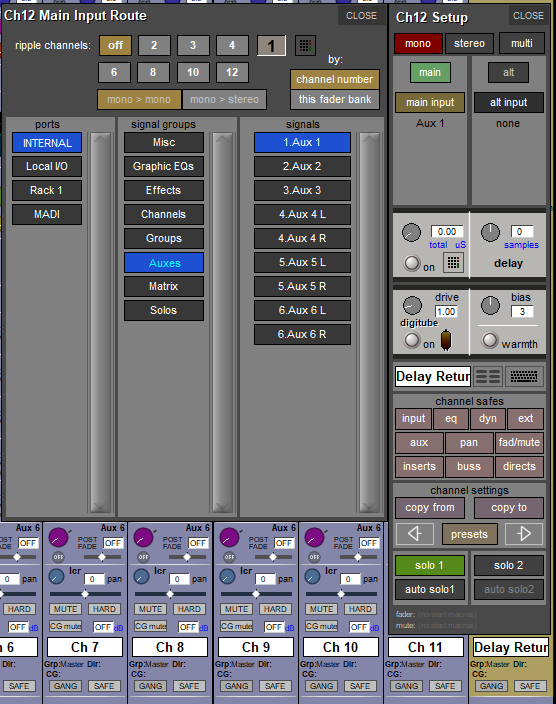
Tip: Make your return channel stereo first if you want to use a stereo effect
On this same FX return channel open an insert point (A or B depending on your preference) and insert the Ten Tap Delay (Don’t forget to turn on the insert!)
Press the PFL button on the FX Return channel and now the FX magically appears on the same screen with a flashing tap tempo button that you can press using the under-screen controls!
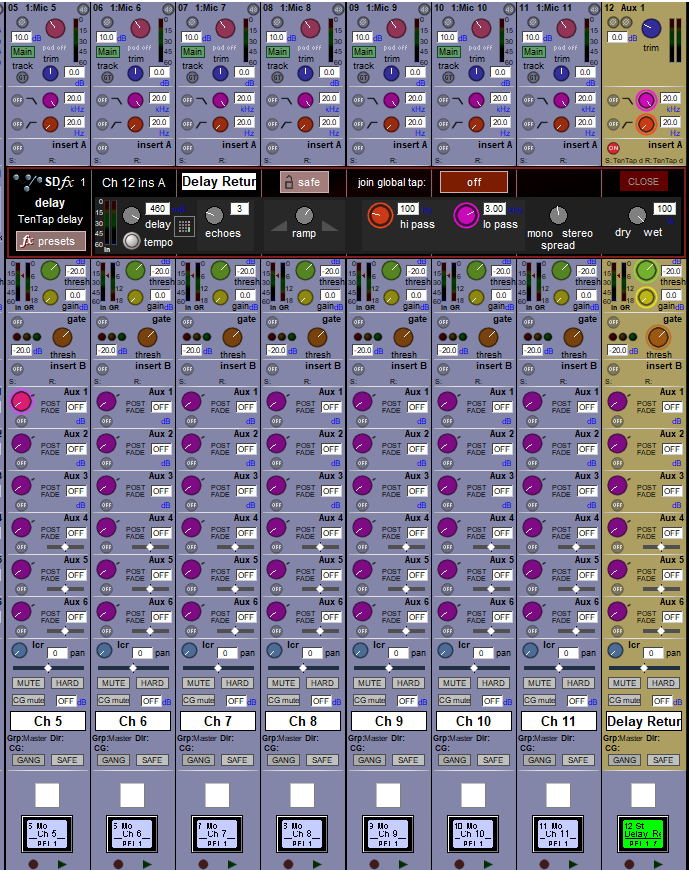
You can use this method for an FX, even ones without tap tempo, so that when you need to make parameter changes, just PFL the FX return channel and the FX will appear on the same screen.
*grabs beer back
Subscribe
Published monthly since 1991, our famous AV industry magazine is free for download or pay for print. Subscribers also receive CX News, our free weekly email with the latest industry news and jobs.
Recent posts


Latest jobs