News
30 Aug 2019
Arkaos Video Content Management
Subscribe to CX E-News
Video
Arkaos Video Content Management

by Simon Pentz, ULA Group.
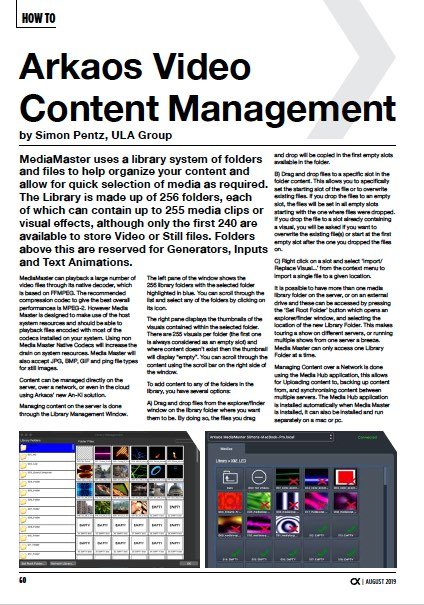
MediaMaster uses a library system of folders and files to help organize your content and allow for quick selection of media as required. The Library is made up of 256 folders, each of which can contain up to 255 media clips or visual effects, although only the first 240 are available to store Video or Still files. Folders above this are reserved for Generators, Inputs and Text Animations.
MediaMaster can playback a large number of video files through its native decoder, which is based on FFMPEG. The recommended compression codec to give the best overall performances is MPEG-2. However Media Master is designed to make use of the host system resources and should be able to playback files encoded with most of the codecs installed on your system.
Using non Media Master Native Codecs will increase the drain on system resources. Media Master will also accept JPG, BMP, GIF and ping file types for still images.
Content can be managed directly on the server, over a network, or even in the cloud using Arkaos’ new An-Ki solution.
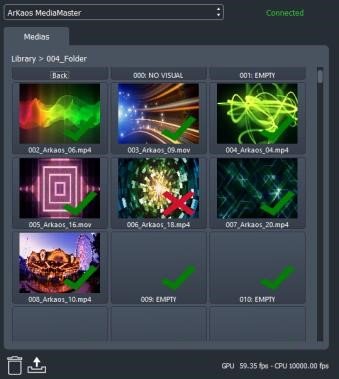
Managing content on the server is done through the Library Management Window.
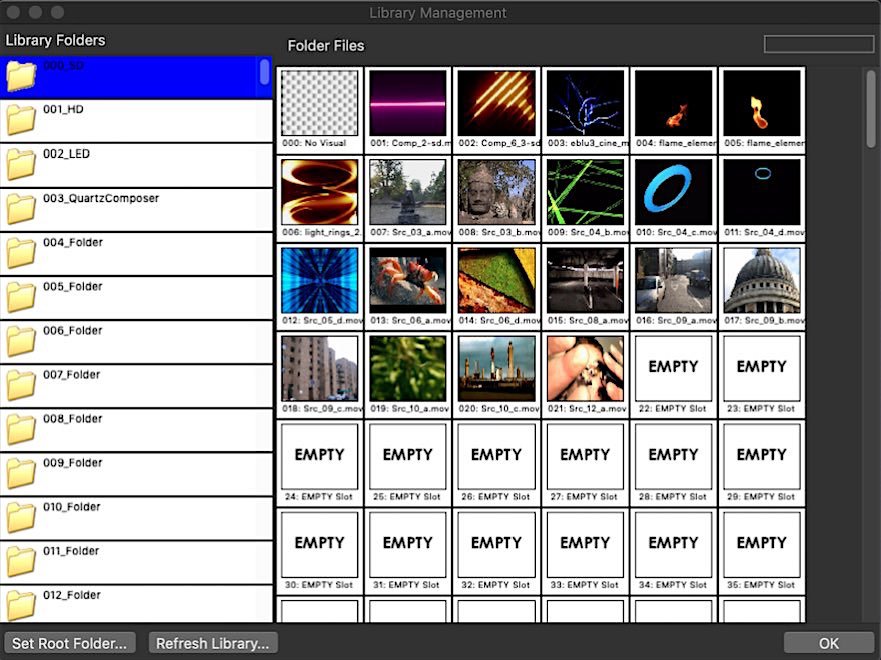
The left pane of the window shows the 256 library folders with the selected folder highlighted in blue. You can scroll through the list and select any of the folders by clicking on its icon.
The right pane displays the thumbnails of the visuals contained within the selected folder. There are 255 visuals per folder (the first one is always considered as an empty slot) and where content doesn’t exist then the thumbnail will display “empty”. You can scroll through the content using the scroll bar on the right side of the window.
To add content to any of the folders in the library, you have several options:
A) Drag and drop files from the explorer/finder window on the library folder where you want them to be. By doing so, the files you drag and drop will be copied in the first empty slots available in the folder.
B) Drag and drop files to a specific slot in the folder content. This allows you to specifically set the starting slot of the file or to overwrite existing files. If you drop the files to an empty slot, the files will be set in all empty slots starting with the one where files were dropped.
If you drop the file to a slot already containing a visual, you will be asked if you want to overwrite the existing file(s) or start at the first empty slot after the one you dropped the files on.
C) Right click on a slot and select ‘Import/Replace Visual…’ from the context menu to import a single file to a given location.
It is possible to have more than one media library folder on the server, or on an external drive and these can be accessed by pressing the ‘Set Root Folder’ button which opens an explorer/finder window, and selecting the location of the new Library Folder.
This makes touring a show on different servers, or running multiple shows from one server a breeze. Media Master can only access one Library Folder at a time.
Managing Content over a Network is done using the Media Hub application, this allows for Uploading content to, backing up content from, and synchronising content between multiple servers.
The Media Hub application is installed automatically when Media Master is installed, it can also be installed and run separately on a Mac or PC. To use Media Hub, Media Master must be running on at least one computer or server on the Network.
The Media Hub UI consists of a single main window that contains a toolbar, 2 server panels and buttons for Synchronising, Uploading and Deleting files.
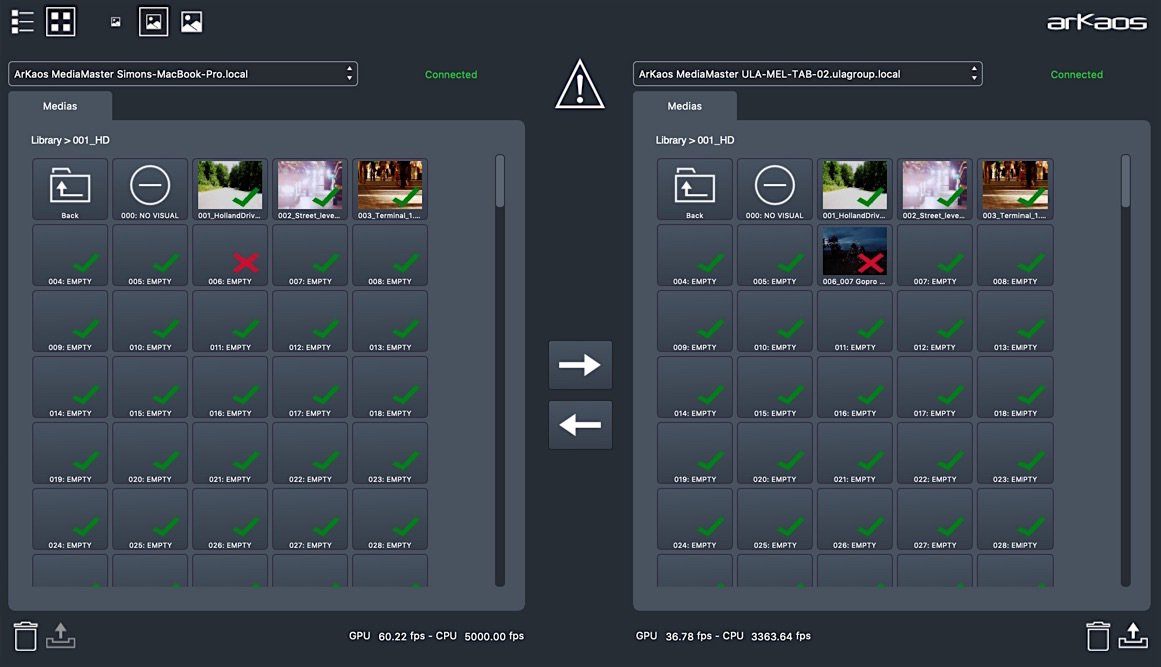
Above each server panel is a drop down box to select the 2 servers for Content Management. Any folders that contain the same content are shown with a green tick, and any that are different will have a red X. The Warning Triangle appears in the centre of the window when the servers are not in sync.
Double clicking on any folder will open it to show the media contained within, again green ticks and red X show the unsynchronised files.
To Synchronise files or folders just select them and press one of the arrows in the centre of the main window. If no content is selected the entire Folder or Server is synchronised.
The synchronisation of files happens between the selected servers and no data passes through the Media Hub application.
The Trashcan and Upload buttons allow for remote deletion and upload of media on the selected server.
Managing content in the Cloud is done using the An-Ki service. An-Ki is a subscription based service where you can upload content to a cloud account linked to a project, create cue lists using the uploaded content and schedule when these cue lists run.
A proprietary An-Ki player software program is installed on a server(s) connected to the internet anywhere in the world and linked to the project. These servers will then playback the content synchronised to NTP protocol meaning that all connected servers will be within 20ms of each other no matter where they are in the world.
This makes a perfect solution for permanent remote installations. It is aimed at the Retail, Hospitality, Signage and Architainment markets.
An-Ki is currently in the Beta test stage.
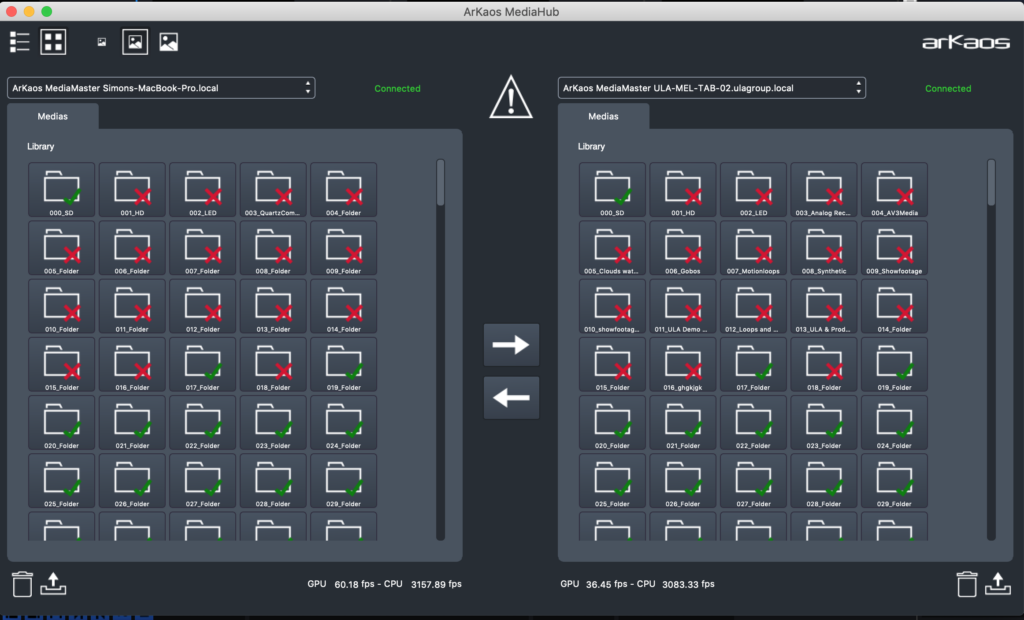
Media Hub – Folder Level 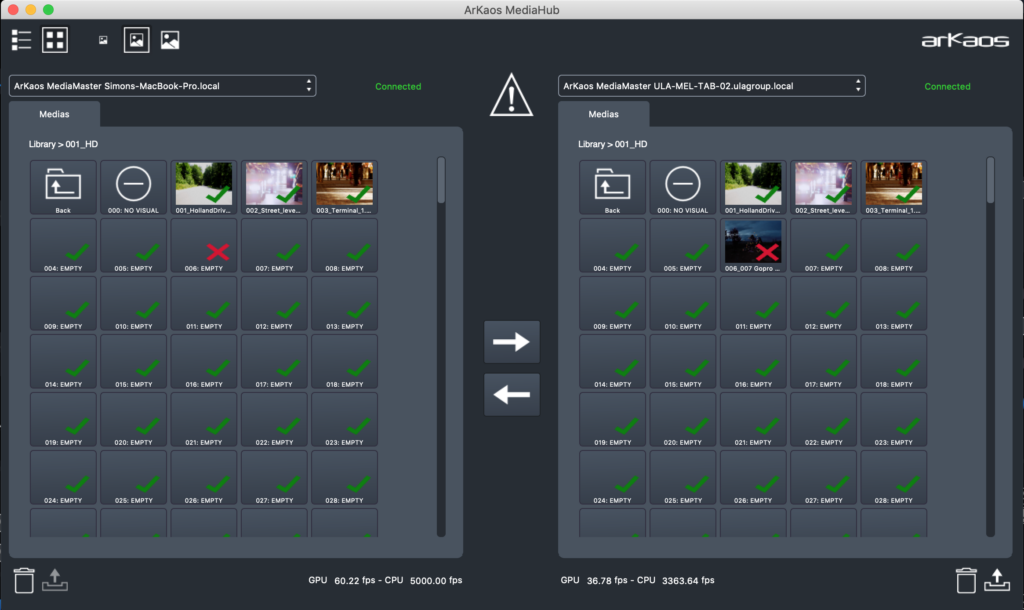
Media Hub – File Level 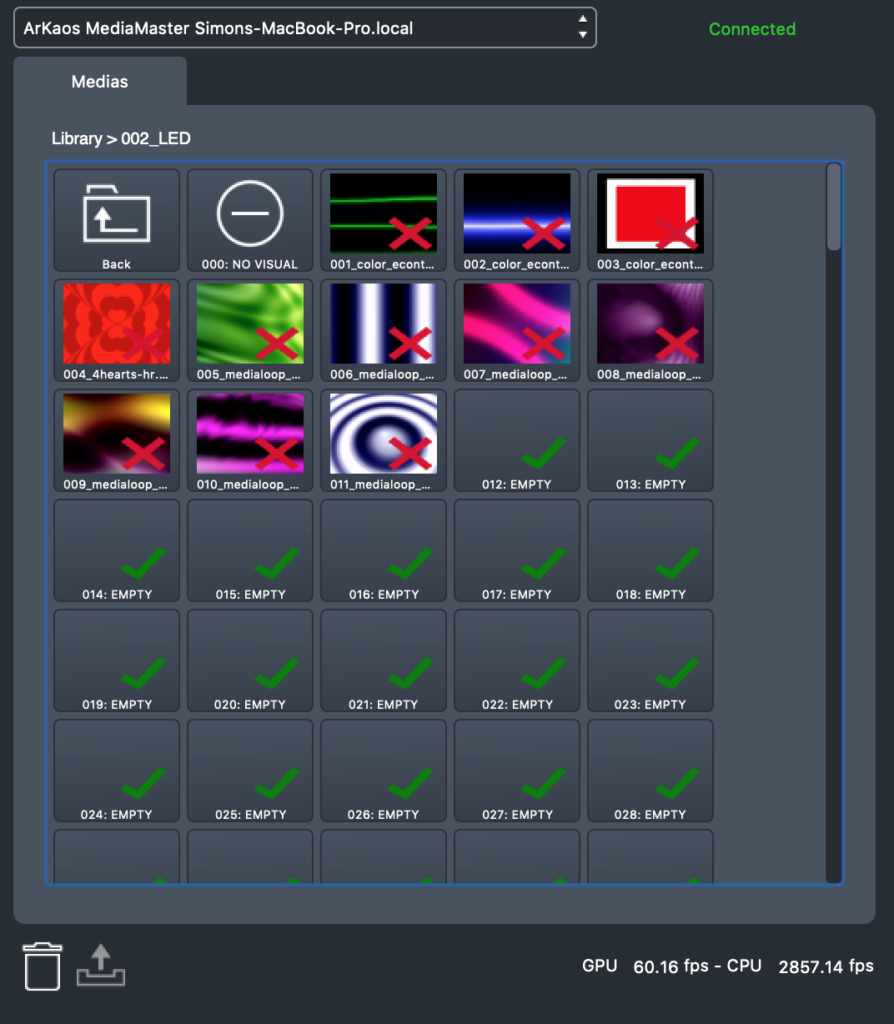
Media Hub – File Level Zoom
CX Magazine – August 2019 Entertainment technology news and issues for Australia and New Zealand – in print and free online www.cxnetwork.com.au
© CX Media
Subscribe
Published monthly since 1991, our famous AV industry magazine is free for download or pay for print. Subscribers also receive CX News, our free weekly email with the latest industry news and jobs.
Recent posts

Latest jobs